


 Matric Group
1 min read
What Are PCB Functional Testing Services?
Electronics manufacture and testing are like squabbling siblings. PCB testing is a necessary expense that, when done correctly, prevents much larger...
PCB design can be challenging. The complexity of your project and the potential consequences of PCB failure may require thorough, high-level testing to ensure your product's success before launch.
One of the most dependable methods for testing printed circuit boards (PCBs) is flying probe testing. This guide walks you through the essentials of flying probe testing, its applications, and best practices for setting your contract manufacturer up for success.
Whether you’re a newcomer or looking to optimize your current PCB testing processes, this article will help you understand the value of flying probe testing and the essential documentation for smooth, quick testing.
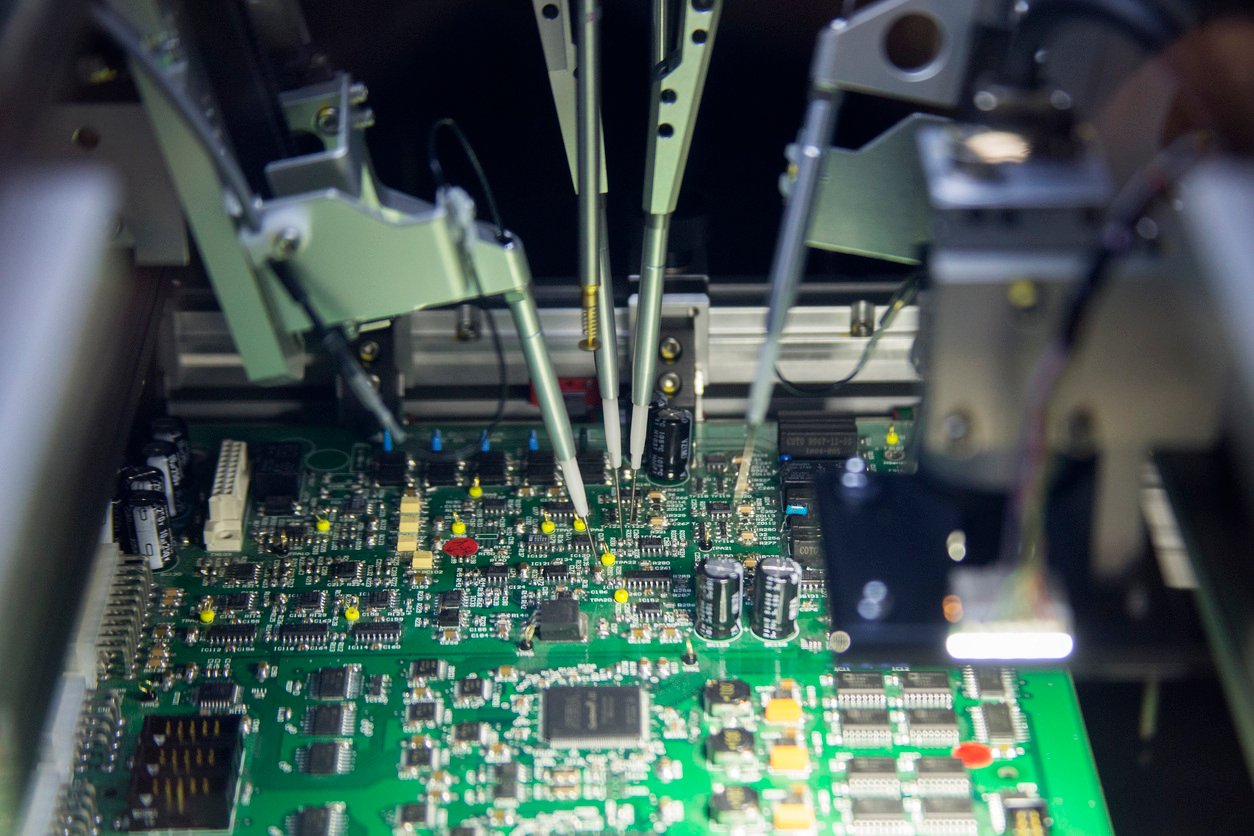
The flying probe test is a standard testing method for inspecting PCBs. Often compared to in-circuit testing (ICT), it remains a popular choice due to its accuracy and flexibility.
Unlike ICT, which requires a specially designed fixture, a flying probe tester uses probes (or “needles”) to test specific points on the board without powering up the circuit. This test evaluates multiple parameters, including:
For many projects, the flying probe machine can handle a range of testing needs quickly and accurately, making it a valuable alternative to ICT, especially for low- to medium-production volumes.
Explore the Ultimate Guide to PCB Testing and Prototyping MethodsLooking to deepen your understanding of PCB testing? Our Ultimate Guide to PCB Testing and Prototyping Methods breaks down the most effective testing options, helping you make informed choices at each production phase. Download today: |
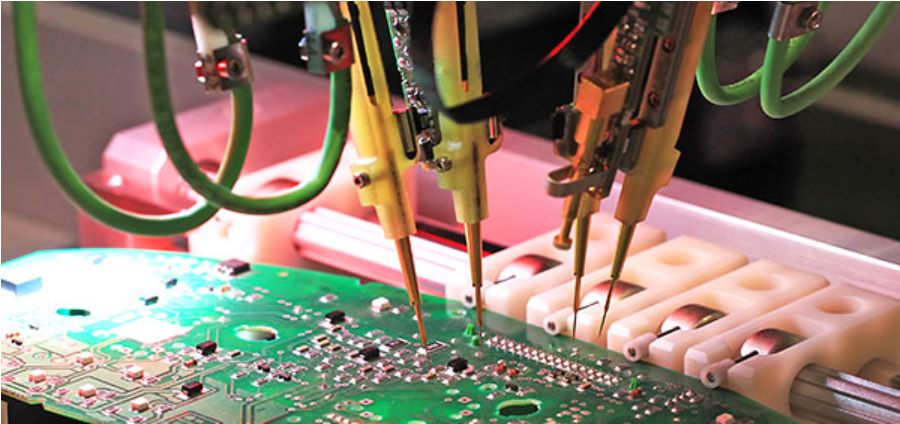
Flying probe machines come in various configurations. Simple systems can have 4 probes, testing one side of the board, while complex systems can have up to 20 probes, and can probe both sides of the board at the same time. Tests can include IC programming, boundary scan technology, powered LED diode inspection to determine correct color and polarity, optical tests including bar code reading, and thermal scanning.
The flying probe test relies on data from CAD files, such as ASCII or ODB machine files. Here’s a breakdown of the process:
If you’re weighing the benefits of flying probe testing versus in-circuit testing, here’s why the flying probe test might be a better fit for your needs:
Flying probe testing requires no custom fixture, making it cost-effective for low-volume production. The initial investment and setup time for smaller runs are significantly lower than with ICT. A flying probe test can be developed in hours and is easily edited, while an ICT test and fixture take weeks to design and manufacture.
A flying probe machine delivers reliable results, reducing the risk of issues in the final product. This accuracy is often enough to catch potential problems before they affect functionality.
One of the standout features of flying probe testing is its flexibility. Since the test doesn’t require custom fixtures, a redesign of the board does not require expensive modifications to a fixture.
Once the initial test program is set up, minimal adjustments are required for future tests. Your contract manufacturer can quickly rerun the PCB flying probe tester on additional units.
Despite its many benefits, flying probe testing isn’t perfect. Here’s what you should consider:
The flying probe test only looks at a few points at a time, so it doesn’t provide a full real-world view of circuit performance. It is a supplement to functional testing, not a substitute for it.
Flying probe machines require two access points per connection, making testing difficult for Ball Grid Arrays (BGAs) and other components with hidden contacts.
PCB designers should consider creating their PCB to ensure that probes can access the critical points needed for testing.
While the flying probe test is excellent for small batches, it may not be ideal for high-volume production. ICT generally offers faster run times for large orders, making it more efficient for high quantities.
Flying probe testing shines in applications where:
Discover Matric’s Advanced Manufacturing CapabilitiesExplore how Matric’s cutting-edge technology and expertise can bring your PCB designs to life with precision and quality. We support projects across industries to ensure reliable, high-performance results — from assembly to testing. Learn more here:
|
For a quick turnaround and high test accuracy, be sure to provide your contract manufacturer with essential documentation:
Flying Probe Testing at Matric GroupAt Matric Group, we specialize in providing quick, reliable flying probe testing. We operate three machines across our Seneca and Freeport, Pennsylvania, facilities, and our systems offer flexibility for handling large and small boards. For each test, we can generate a detailed report, providing:
Our facilities also offer customizable testing solutions to address specific design needs, including breakaways, access points, and more. |
Flying probe testing is a valuable alternative to ICT, but it often works best in tandem with other inspection methods, such as:
Flying probe testing is likely the right fit if your project involves low-to-medium volume PCB production and you seek a reliable, accurate test without high upfront costs. Its flexibility, accuracy, and efficiency make it ideal for early production phases, prototyping, and small batch runs.
Matric Group offers tailored solutions, ensuring your PCB flying probe tester is set up for optimal performance based on your specific needs. Contact us to discuss your documentation, volume, and design requirements so we can provide the best testing setup for your project.


1 min read
Electronics manufacture and testing are like squabbling siblings. PCB testing is a necessary expense that, when done correctly, prevents much larger...
1 min read
Deciding on the best testing method for your printed circuit board can feel overwhelming. You’re balancing cost, coverage, and development time, all...

1 min read
When you order printed circuit boards, you already understand the costly consequences of failure. The last thing you need is for your PCBs to...